One thing I haven't been very good at is maintaining good documentation of my wiring. I have always made rough drawings but these are often difficult for me to interpret a year or two later. Here is an example:

I recently discovered a much better way of doing this. In a matter of minutes, I was able to create the following drawing (it depicts a different project from the above example):

This was created using Tinkercad by Autodesk. I have been using Tinkercad ever since purchasing my 3D printer. I use it to design 3D objects.
I was recently doing some on-line research in connection with my recent project. I am working on model railroad crossing lights operated using several photoresistors to detect the presence of a train and an Arduino for logic as to when the crossing lights should flash. In particular, I wanted a refresher on the use of "pull-up" and "pull-down" resistors. In one of the YouTube videos I watched it was clear that the presenter was using a very clever piece of software with which to do his demonstrations. I was eventually able to determine that he was using Tinkercad.
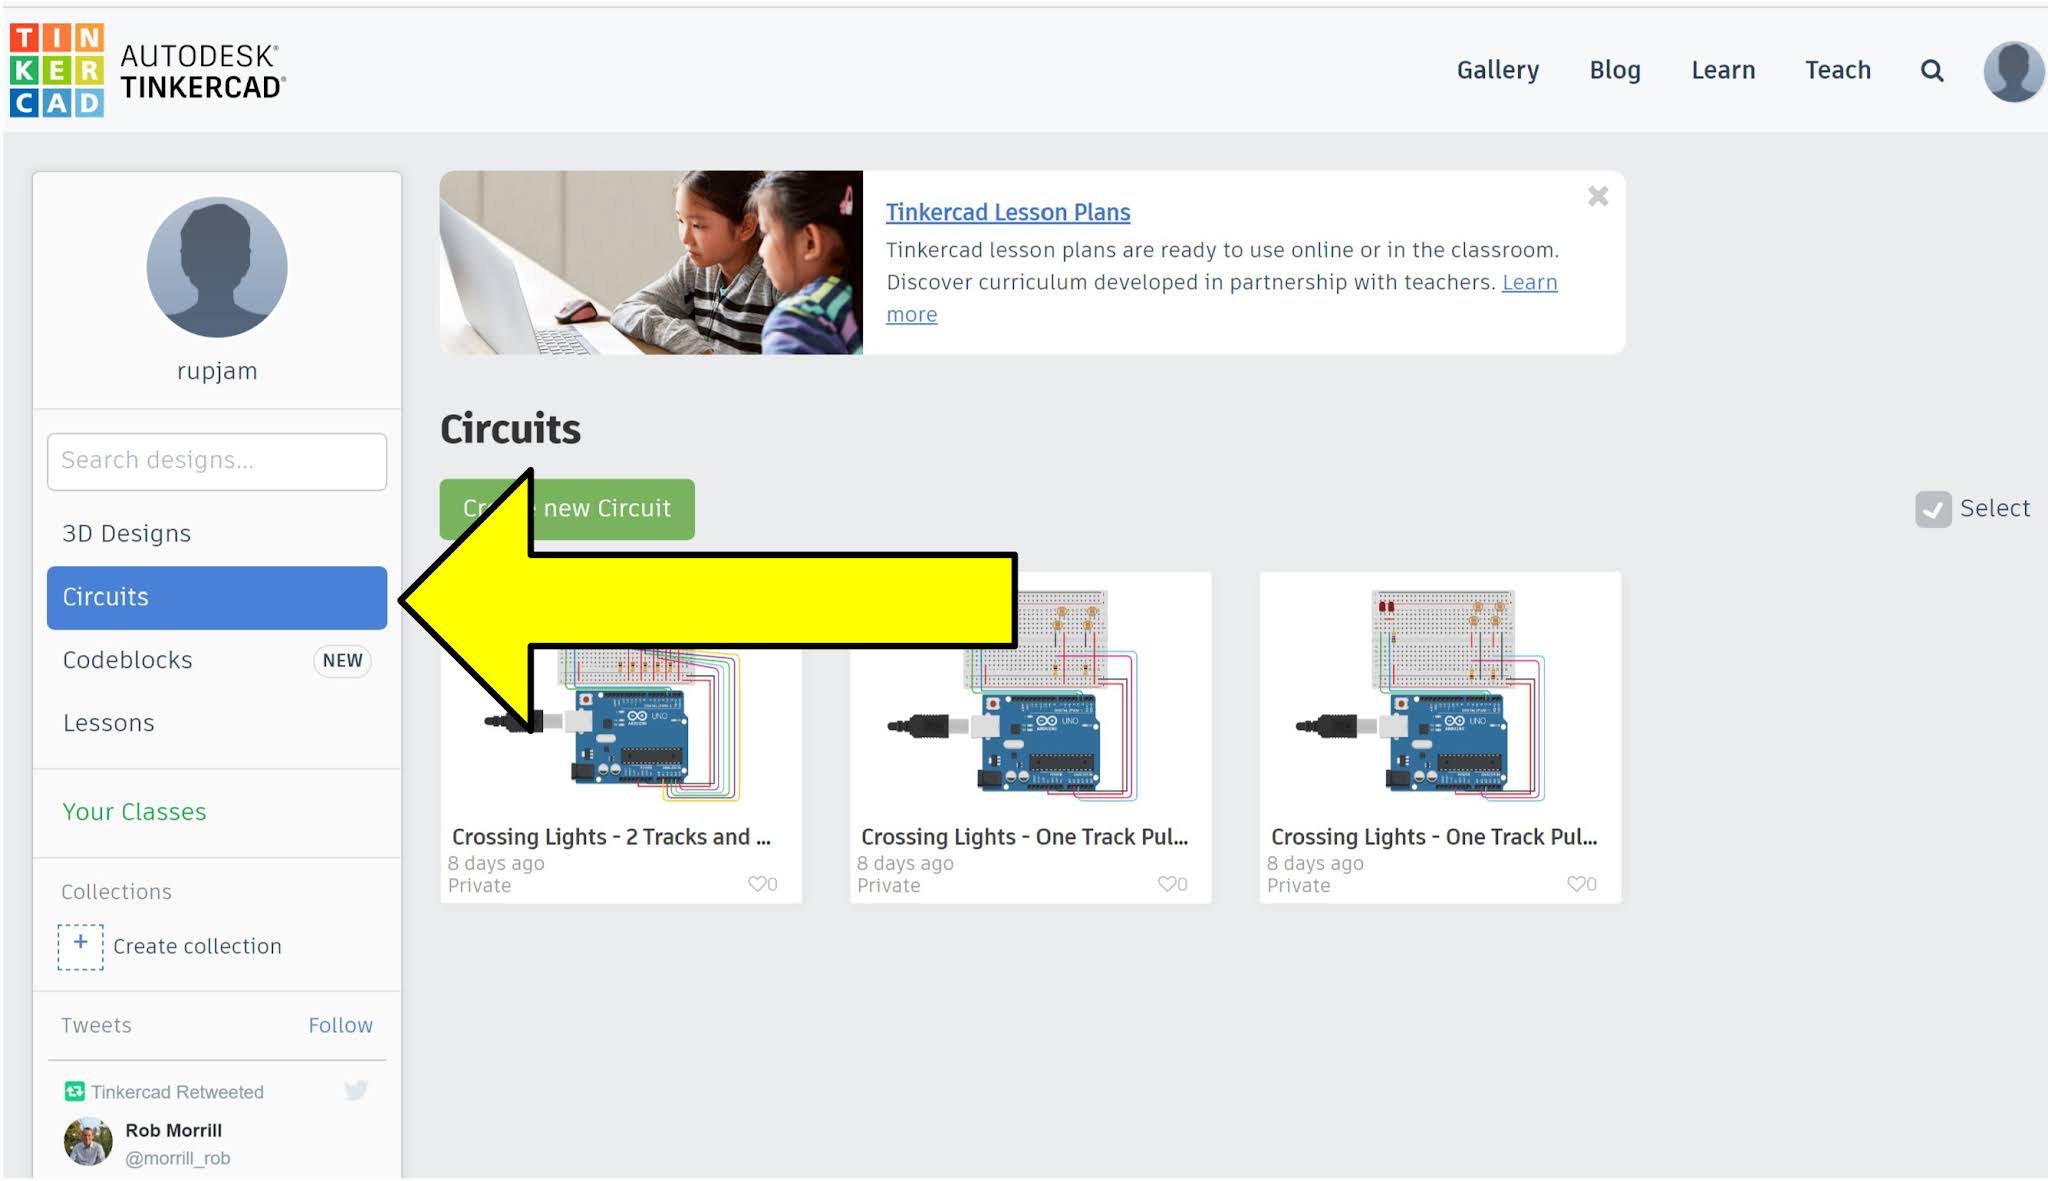
Tinkercad is free - you need to sign in with an email and password (they have never emailed me any unwanted advertising or other junk). Instead of selecting "3D Designs", select "Circuits"as indicated with the arrow below:
Next choose "Create New Circuit" which will take you to this screen where you can select "Arduino" from the pull-down menu on the right where the yellow arrow is pointing:

If you are familiar with Tinkercad you will know that the software will assign it's own random name to every project (the green arrow shows that, in this case, it selected "Sizzling Kup"). By clicking on this name you can assign your own name to the project by typing over the random name.
Clicking the yellow arrow above results in the following pre-made circuits down the right-hand side of the page. At time of writing there are 22 circuits and one that is strictly a breadboard wired to an Arduino that can be used to design your own circuits.

Using the pre-made circuit named "Servo" for illustration, click/drag it into the white workspace, as shown:
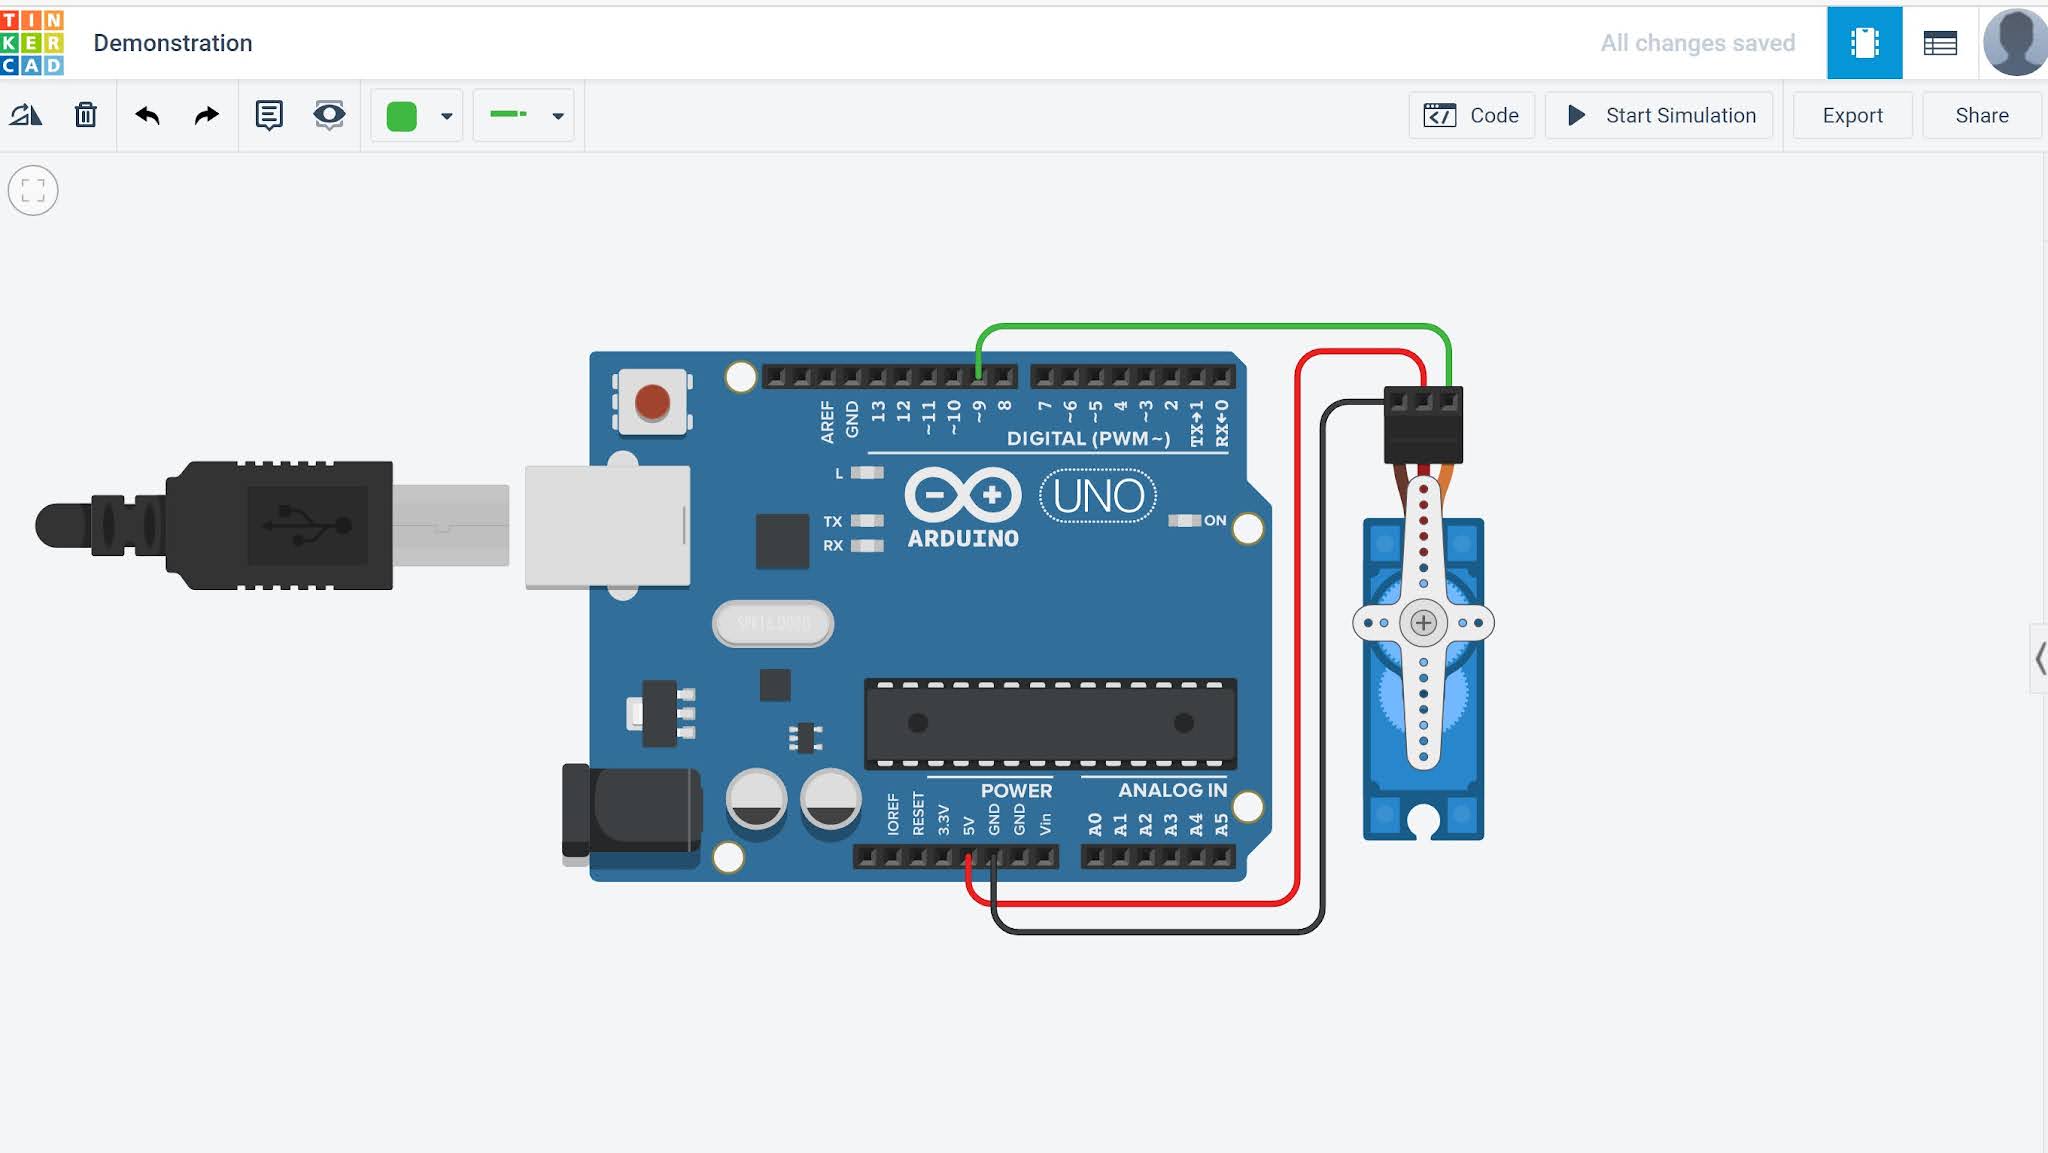
As you can see this is a drawing of an Arduino UNO microcontroller wired to a servo. The wires can be dragged and dropped to other pins, more wires can be added and the shape and colour of the wires can be changed.
In addition to the above, by clicking on the "Start Simulation" box in the top right corner of the screen the graphically depicted USB cable will plug into the Arduino. This powers it up and the servo will move according to how the Arduino is programmed.
Clicking on the "Code" box to the left of the "Start Simulation" box will reveal the following:

These are called "blocks". Those on the left will allow you to simply and graphically create Arduino programming code (C++). Those coloured blue are Outputs, purple are Inputs, etc. Select the desired block on the left and drag it to the screen on the right. Some of these contain variable parameters such as milliseconds or counter values.
Clicking on the pull-down menu labelled "Blocks" reveals three choices, Blocks, Blocks + Text or Text. Text is the C++ code that can be copied and pasted directly into the Arduino software (Arduino IDE).
Numerous circuit components including resistors, capacitors, LED's, servos, motors, etc. are found in the same pull-down menu on the right where you found the Arduinos. Simply drag and drop the components to where you want them and connect them using the wire colour and type that you wish.
This tool allows you to design a circuit, write the code and test the code all on your computer. Once you are satisfied with what you have built you can use your drawing to create your invention using actual components. The clean graphics will allow you to save a documentation copy for future reference or to share it with others using a blog or by email. With the code copied into the Arduino IDE you can upload it into your actual Arduino to run your circuit.
As for practically everything in life there are YouTube videos available to help get you started. The official Autodesk Tinkercad channel is here: YouTube
Kudos to the creators of this tool who have put a lot of thought into its design.